- For the Dark Souls II variant, see Belfry Gargoyles.
The Bell Gargoyles are a pair of bosses and also a mini-boss in Dark Souls.
Location[]
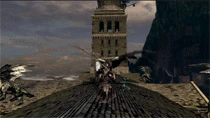
On top of the church in the Undead Parish, reached by passing through the room full of hollows and a Channeler, before climbing two ladders and finally entering the fog gate. They are also found in Anor Londo as mini-bosses- exit the first bonfire, go straight on and down the lift, and a gargoyle will be straight ahead. The second is beyond the rotating staircase-bridge.
Lore[]
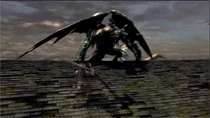
Gargoyles are stone creatures created by the Gods through magic[1] to help patrol Anor Londo or sites deemed important[2]. In addition to their though and hard skin[1], they are able to breathe fire or lightning[3] and are armed with a bronze shield and a bronze helmet for purely decorative purposes while they use a bronze halbert as a weapon.
After Lord Gwyn sacrificed himself to link the First Flame and prolong the Age of Fire, several Gargoyles were placed to guard the Bell of Awakening placed on the Undead Church of the Undead Burg and act as ritual challenge[1]. In fact, the Undead who tried to follow in Gwyn's footsteps to sacrifice themselves to the Flame would have to be tested even before obtaining the Lordvessel and seeking powerful souls[4]. Ringing the Bells of Awakening represents only the first of these challenges, and success means gaining access to Sen's Fortress to be tested further[5].
Strategy[]
As a human, it is possible to have Solaire of Astora and/or Knight Lautrec of Carim assist during this battle, although Lautrec must be freed and spoken to in Firelink Shrine first. Their summon signs are found just before the white light leading to the Gargoyles. Summoning both knights and simply mobbing each Gargoyle can lead to a quick and relatively painless victory.
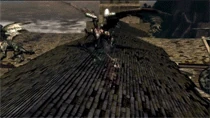
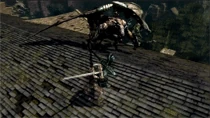
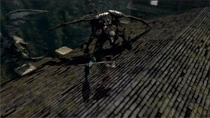
The fight begins with the constant danger of falling off (target-locking, coupled with the camera angle and narrow field of view, can make it hard to see where the main character's feet are) and facing off against a single gargoyle on top of the church roof. Trying to circle the gargoyle while holding up a shield is a good way to avoid its long-reaching frontal attacks. If the gargoyle takes off, move away or get ready to dodge its plunging attack.
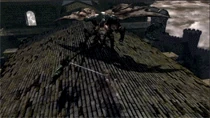
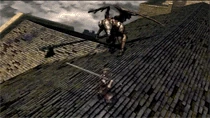
Once the first gargoyle is cut down to half its health, the second gargoyle will join the fight. Fortunately, this gargoyle is already severely injured (it arrives at half-health). It has the same attacks as the first gargoyle minus the ones that involve flying or using the tail.
Players having difficulty managing their positioning against the two gargoyles should save any consumables (ex., Fire Bombs) until the first gargoyle's health is approaching 50%, and then use them to finish it off quickly, before the second one starts attacking. The use of Gold Pine Resin and other weapon enhancements can also make this fight easier.
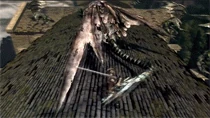
Both Gargoyles wield halberds and can breathe fire, although the first gargoyle usually will only breathe fire after the second one jumps down. A fire-resistant shield such as the Black Knight Shield (and, optionally, fire-resistant armor) can be very useful, as the fire breath covers a wide area. While breathing fire, the gargoyles won't move, making it the perfect opportunity to run over and hit them from behind (this makes avoiding or blocking the fire doubly important, as its stagger effect will consume precious seconds, limiting the time available to attack the gargoyles). In addition, the first gargoyle's tail can be severed to gain a weapon (Gargoyle Tail Axe).
The two Gargoyles fought in Anor Londo breathe lightning rather than fire, so a lightning-resistant shield will prove beneficial. A strategy for the second gargoyle is for the player to run to the bottom of the rotating staircase before activating the lever, where the gargoyle (on a ledge above) will be unable to reach them. However, this means it must then be defeated with ranged attacks.
Boss information[]
Characteristics[]
| Respawn | No |
|---|---|
| Backstab | No |
| Damage Types | Regular / Fire / Lightning |
| Abilities | Can breathe fire/lightning. Can fly short distances. |
Attacks[]
Swing[]
| Attack Type | Status | Parryable | Tracking | Speed | ||||
|---|---|---|---|---|---|---|---|---|
| 211 | 0 | 0 | 0 | Regular | None | No | Both | Slow |
Two Handed Swing[]
| Attack Type | Status | Parryable | Tracking | Speed | ||||
|---|---|---|---|---|---|---|---|---|
| 226 | 0 | 0 | 0 | Regular | None | No | Both | Slow |
Stab[]
| Attack Type | Status | Parryable | Tracking | Speed | ||||
|---|---|---|---|---|---|---|---|---|
| 255 | 0 | 0 | 0 | Regular | None | No | Neither | Medium |
Shield Bash[]
| Attack Type | Status | Parryable | Tracking | Speed | ||||
|---|---|---|---|---|---|---|---|---|
| 221 | 0 | 0 | 0 | Regular | None | No | Neither | Slow |
One Handed Slam[]
| Attack Type | Status | Parryable | Tracking | Speed | ||||
|---|---|---|---|---|---|---|---|---|
| 275 | 0 | 0 | 0 | Regular | None | No | Neither | Slow |
Two-Handed Slam[]
| Attack Type | Status | Parryable | Tracking | Speed | ||||
|---|---|---|---|---|---|---|---|---|
| 288 | 0 | Fire | 0 | Regular | None | No | Neither | Slow |
Front Tail Whip[]
| Attack Type | Status | Parryable | Tracking | Speed | ||||
|---|---|---|---|---|---|---|---|---|
| ??? | 0 | 0 | 0 | Regular | None | No | Neither | Medium |
Back Tail Whip[]
| Attack Type | Status | Parryable | Tracking | Speed | ||||
|---|---|---|---|---|---|---|---|---|
| ??? | 0 | 0 | 0 | Regular | None | No | Neither | Medium |
Flying Swing[]
| Attack Type | Status | Parryable | Tracking | Speed | ||||
|---|---|---|---|---|---|---|---|---|
| 319 | 0 | Fire | 0 | Regular | None | No | Neither | Slow |
Flying Tail Whip[]
| Attack Type | Status | Parryable | Tracking | Speed | ||||
|---|---|---|---|---|---|---|---|---|
| 365 | 0 | 0 | 0 | Regular | None | No | Neither | Slow |
Landing Attack[]
| Attack Type | Status | Parryable | Tracking | Speed | ||||
|---|---|---|---|---|---|---|---|---|
| 225 | 0 | Fire | 0 | Regular | None | No | Neither | Fast |
Flame Breath[]
| Attack Type | Status | Parryable | Tracking | Speed | ||||
|---|---|---|---|---|---|---|---|---|
| 0 | 0 | 281 | 0 | Fire | None | No | Neither | Medium |
More commonly used after the appearance of the second gargoyle.
Aerial Flame[]
| Attack Type | Status | Parryable | Tracking | Speed | ||||
|---|---|---|---|---|---|---|---|---|
| 0 | 0 | ??? | 0 | Fire | None | No | Neither | Medium |
Only used after the appearance of the second gargoyle, but can only be performed by the original gargoyle.
Defenses[]
| Enemy Version | Physical Defenses | Elemental Defenses | Resistances | |||||||
|---|---|---|---|---|---|---|---|---|---|---|
| Boss | 133 | 133 | 133 | 133 | 103 | 98 | 104 | A | A | A |
| Miniboss | 258 | 258 | 258 | 258 | 199 | 162 | 251 | A | A | A |
These stats are sourced from FuturePress's Official Dark Souls Strategy Guide.
Drops[]
| Item |  Gargoyle Tail Axe |
 Gargoyle's Halberd |
 Gargoyle's Shield |
 Gargoyle Helm |
| Drop Rate | Sever Tail | 3%* | 3%* | 3%* |
- * Guaranteed drop from the last Gargoyle in Anor Londo if not already obtained.
Trivia[]
- The Bell Gargoyles boss fight is based on the Maneaters boss fight from Demon's Souls.
Gallery[]
")
.jpg "DS1 Promotional screenshot (Bell Gargoyle).jpg (1.02 MB)")
")
")
")
")
")
")
")
")
Videos[]
")
Music[]

- ↑ 1.0 1.1 1.2 Gargoyle Helm description.
- ↑ Gargoyle Tail Axe description.
- ↑ Bell Gargoyles#Attacks
- ↑ Crestfallen Warrior dialogue: "Well, what do we have here? You must be a new arrival. Let me guess. Fate of the Undead, right? Well, you're not the first. But there's no salvation here. You'd have done better to rot in the Undead Asylum... But, too late now. Well, since you're here... Let me help you out. There are actually two Bells of Awakening. One's up above, in the Undead Church. The other is far, far below, in the ruins at the base of Blighttown. Ring them both, and something happens... Brilliant, right? Not much to go on, but I have a feeling that won't stop you. So, off you go. It is why you came, isn't it? To this accursed land of the Undead? Hah hah hah hah..."
- ↑ Bells of Awakening#Plot